
There’s something special about getting crafty and making beautiful things with your hands. Whether you’re looking for a relaxing solo project or a fun activity to do with friends, these girly craft ideas are perfect for adding a touch of charm and creativity to your day. Each craft includes a list of supplies and step-by-step instructions, so you can easily bring these ideas to life.
1. DIY Floral Candle Jars
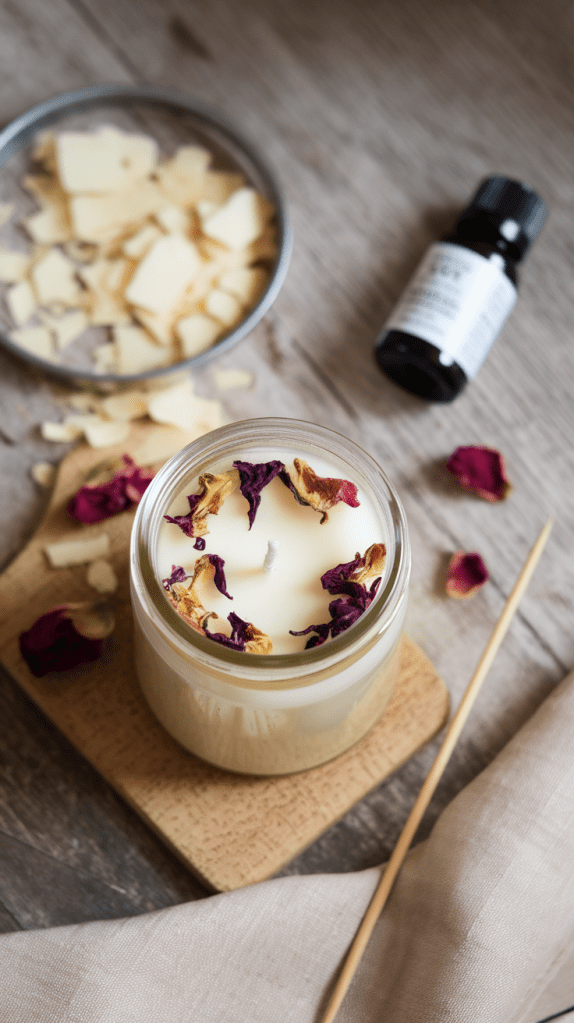
Create lovely floral-scented candles in pretty jars, perfect for decorating your space or gifting to a friend.
Supplies:
- Soy wax flakes
- Candle wicks
- Heatproof glass jars
- Dried flower petals (rose, lavender, or chamomile)
- Essential oils (lavender, rose, or vanilla)
- Double boiler or microwave-safe bowl
- Wooden skewer or chopstick
- Glue gun (optional)
Instructions:
- Place the wick in the center of the jar, using a glue gun to secure it if needed.
- Melt soy wax flakes using a double boiler or microwave. Stir gently until fully melted.
- Add a few drops of essential oil to the melted wax for fragrance.
- Carefully pour a thin layer of wax into the jar and sprinkle dried flower petals.
- Pour the remaining wax, leaving a small gap at the top. Hold the wick upright using a wooden skewer or chopstick.
- Let the candle cool and harden for several hours. Trim the wick to about 1/4 inch before lighting.
2. Beaded Friendship Bracelets
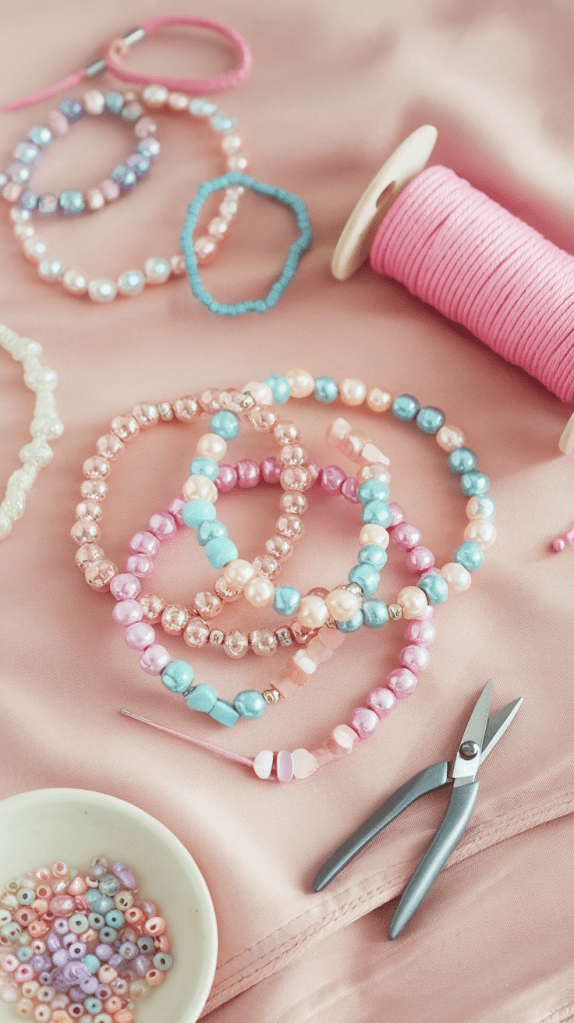
Colorful beaded bracelets are fun to make and perfect for accessorizing any outfit.
Supplies:
- Elastic cord or beading thread
- Assorted beads (pearls, pastel beads, letter beads)
- Scissors
- Clear nail polish or jewelry glue (optional)
Instructions:
- Cut a piece of elastic cord, leaving extra length to tie the bracelet.
- String beads in your desired pattern, mixing colors, shapes, and letters if you like.
- When the bracelet is the right size, tie a secure knot and pull it tight.
- Dab clear nail polish or jewelry glue on the knot for added strength.
- Trim any excess cord and slip the bracelet onto your wrist.
3. Decorative Photo Collage Board
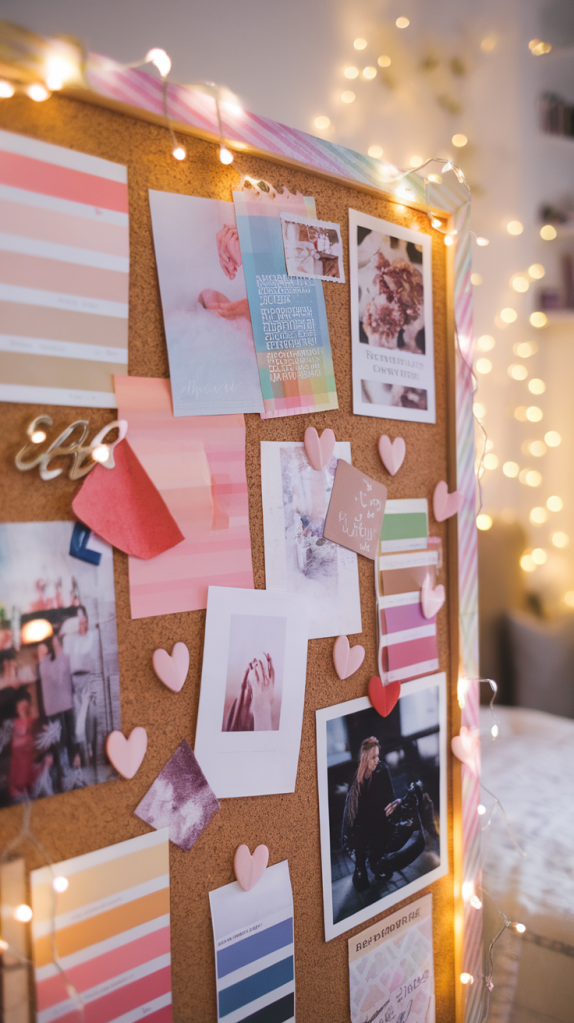
Showcase your favorite photos, quotes, and mementos on a cute and personalized collage board.
Supplies:
- Corkboard or foam board
- Printed photos, postcards, and magazine clippings
- Decorative paper and stickers
- Push pins or double-sided tape
- Ribbon, lace, or fairy lights (optional)
Instructions:
- Arrange your photos and decorations on the board without attaching them to see how they look.
- Use push pins or double-sided tape to secure each piece.
- Add stickers, washi tape, or handwritten notes for extra charm.
- Optional: Wrap ribbon or fairy lights around the board’s edges for a cozy touch.
- Hang your collage board on the wall and enjoy your personalized display!
4. Floral Embroidered Hoop
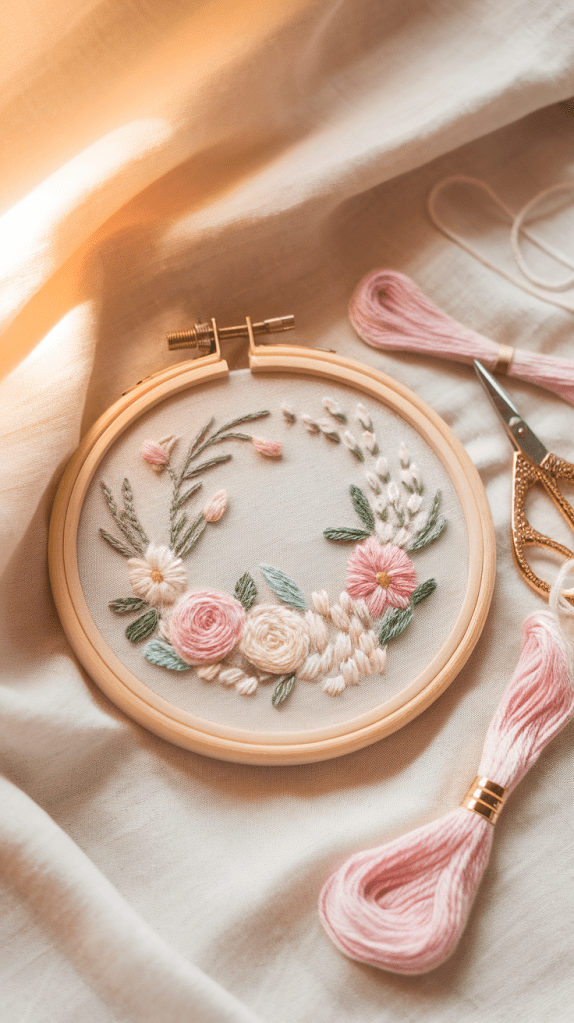
Learn basic embroidery stitches to create a delicate floral design on fabric, framed in a wooden hoop.
Supplies:
- Embroidery hoop
- Fabric (cotton or linen)
- Embroidery floss in pastel or floral colors
- Embroidery needles
- Scissors
- Pencil or fabric marker
Instructions:
- Secure the fabric in the embroidery hoop, pulling it tight.
- Lightly sketch your floral design on the fabric using a pencil or fabric marker.
- Thread your needle with embroidery floss and start stitching. Use a satin stitch for petals, French knots for flower centers, and stem stitches for vines and leaves.
- Continue until your design is complete, then trim any loose threads.
- Secure the fabric at the back of the hoop, trimming off any excess fabric. Display your embroidered artwork as wall decor or a handmade gift.
5. Glitter Resin Keychains

Make sparkly resin keychains in fun shapes like hearts, stars, and flowers.
Supplies:
- Epoxy resin and hardener
- Silicone molds (heart, star, flower shapes)
- Glitter in assorted colors
- Keychain rings and jump rings
- Small charms or dried flowers (optional)
- Gloves and mixing cups
Instructions:
- Mix the epoxy resin and hardener according to the instructions.
- Add glitter and stir gently to combine.
- Pour the mixture into silicone molds, filling them halfway.
- Place small charms or dried flowers inside if desired, then pour the remaining resin to cover them.
- Let the resin cure for 24 hours or until fully hardened.
- Carefully remove the resin shapes from the molds and attach keychain rings using jump rings.
6. Pressed Flower Notebook Cover

Decorate a plain notebook with real pressed flowers for a whimsical and natural look.
Supplies:
- Plain notebook with a hard cover
- Pressed flowers (daisies, violets, ferns)
- Mod Podge or clear-drying craft glue
- Foam brush or paintbrush
- Clear sealant spray (optional)
Instructions:
- Arrange the pressed flowers on the notebook cover until you’re happy with the design.
- Use a foam brush to apply a thin layer of Mod Podge to the cover.
- Carefully place the flowers on the glue, pressing gently to secure them.
- Once dry, apply another thin layer of Mod Podge over the entire cover to seal the flowers.
- Optional: Spray a coat of clear sealant for extra protection and let it dry completely.
7. Macrame Wall Hanging

Create a boho-chic macrame wall hanging using simple knotting techniques.
Supplies:
- Macrame cord (cotton rope)
- Wooden dowel or branch
- Scissors
- Measuring tape
Instructions:
- Cut several pieces of macrame cord, each about twice the length you want your wall hanging to be.
- Fold each piece in half and attach it to the wooden dowel using a lark’s head knot.
- Use square knots, half hitch knots, and spiral knots to create patterns.
- Continue knotting until the design is complete, adjusting the pattern as needed.
- Trim the bottom of the cords evenly or in a V-shape for a polished look. Hang your macrame masterpiece on the wall.
Crafting is a wonderful way to unwind, express creativity, and make beautiful things. I hope these girly craft ideas inspire you to gather your supplies and start creating!


Leave a reply to Ariel Cancel reply